You Just Got a 50-Page Inspection Report. You Have 5 Days to Decide What Matters. Do You Know What You're Looking At?
The inspector spent three hours in the house. He handed you a 50-page report with 147 line items, 83 photographs, and phrases like "serviceable condition," "monitor for further deterioration," and "recommend evaluation by a licensed specialist." Your agent scanned it and said "every house has issues --- this one looks pretty normal."
So you sat at your kitchen table that night and started Googling. "Federal Pacific panel dangerous." "Polybutylene pipe insurance." "Hairline crack in foundation normal or bad." You found a Reddit thread where someone said their FPE panel caught fire. You found another where someone said they lived with one for 30 years with no problems. You found an article about polybutylene pipes that said your homeowner's insurance might refuse to cover you --- but it was from 2018 and you could not tell if it was still true.
By midnight you had 14 browser tabs open, a growing sense of dread, and no clearer understanding of which items on that report are cosmetic annoyances, which are expensive but manageable, and which are the kind of defect that will cost you $15,000 in the first year or make the house uninsurable.
That confusion is not your fault. Inspection reports are written to document --- not to prioritize. They list every defect with equal weight because the inspector's job is liability protection, not buyer guidance. A missing GFCI outlet and a failing electrical panel get the same neutral language. A cosmetic crack and a structural crack get the same photograph. And nowhere in those 50 pages does it say: "This is the one that should kill the deal."
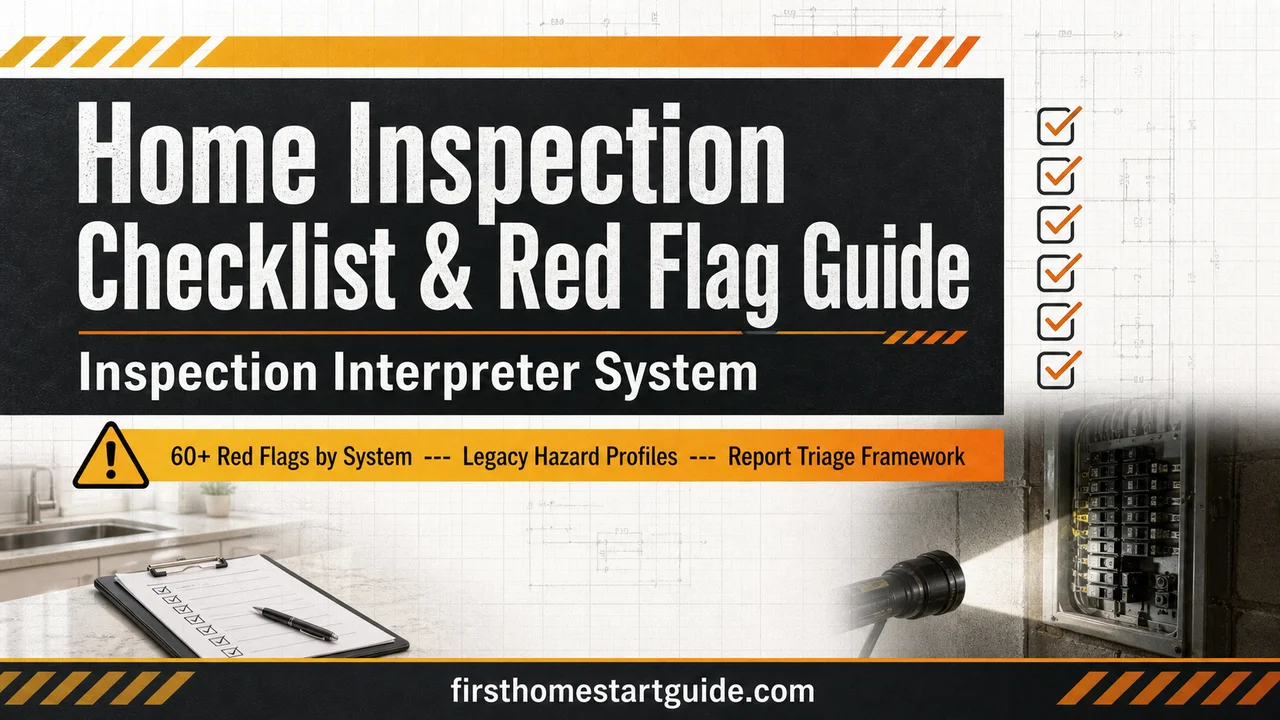
The Home Inspection Checklist & Red Flag Guide is an Inspection Interpreter System --- a structured framework that sits between you and your inspection report, translating every line item into a clear priority category, a realistic cost range, an insurance implication, and a negotiation action. It replaces the midnight panic-Googling with a reference you open alongside your report, match each finding against, and walk away knowing exactly which defects are cosmetic, which are negotiable, and which are walk-away-from-the-deal serious.
What's Inside the Inspection Interpreter System
A 16-chapter guide, a quick-start checklist, and 5 standalone printable tools --- 7 PDFs total, organized by the building system you are evaluating, so you can match any line item from your inspection report to the right response in under two minutes:
Room-by-Room Red Flag Checklist (60+ Items by System)
Your inspection report is organized by area --- roof, exterior, electrical, plumbing, HVAC, structure, interior. So is this checklist. For every system, it lists the specific defects that actually matter: the ones that cost more than $1,000 to fix, the ones that affect insurability, and the ones that indicate hidden damage behind what the inspector could see. Each item includes the brand names, material types, and visual identifiers you need to spot the problem in your report or during the inspection itself --- not "check the electrical panel" but "look for the brand name Stab-Lok, Zinsco, or Sylvania on the panel door or breaker handles."
Legacy Hazard Profiles
Certain brand names and materials in an inspection report are not just defects --- they are categories of risk that change your insurance options, your negotiation leverage, and sometimes whether you should buy the house at all. The guide provides detailed profiles for each one:
- Federal Pacific Electric (FPE) Stab-Lok panels --- manufactured from the 1950s through the 1980s, with a documented 25% failure-to-trip rate on double-pole breakers in independent testing. Replacement cost: $3,500 to $5,600 including NEC 230.85 emergency disconnect requirements. Many insurers will not write a new policy on a home with an FPE panel still installed.
- Zinsco and Sylvania panels --- breakers that fuse to the bus bar and fail to trip during overcurrent events. Replacement cost comparable to FPE. Same insurance implications.
- Polybutylene piping (PB) --- installed in roughly 10 million US homes between 1978 and 1995. Deteriorates from the inside when exposed to chlorine and chloramine in municipal water. Insurance exclusions became widespread after Guadiana v. State Farm established that polybutylene degradation is a maintenance issue, not a covered peril. Full repipe cost: $1,500 to $15,000 depending on home size and accessibility.
- Orangeburg sewer pipe --- wood-fiber pipe treated with coal tar pitch, used from the 1940s through the 1970s. Collapses under soil pressure. Average remaining life in 2026: zero. Replacement: $3,000 to $7,000.
- Cast iron drain lines, clay sewer pipe, galvanized supply lines --- each with expected lifespan data, failure signatures visible on camera, and replacement cost ranges.
- Knob-and-tube wiring --- not inherently dangerous when original, but almost always compromised by later modifications. Insurance implications, remediation options, and cost ranges.
- Aluminum branch wiring --- connection point overheating risk, COPALUM and AlumiConn remediation options, and the cost difference between pigtailing ($50 to $80 per connection) and full rewire ($8,000 to $15,000).
Specialty Inspection Decision Framework
Your general inspector flagged something. Now your agent says you "might want to get a specialist to look at it." Which specialty inspections are worth the money, and which are the inspector covering their liability? The framework maps each trigger to a decision: sewer scope ($125 to $500 --- worth it on any home built before 1980 or with large trees near the sewer line), radon testing ($100 to $250 --- essential in EPA Zone 1, optional elsewhere), mold testing ($150 to $400 --- only when you see visible growth or smell musty air, not as a precaution), septic inspection ($200 to $900 --- non-negotiable if the home is on septic), and structural engineer evaluation ($500 to $1,500 --- triggered by specific crack patterns, not by "the inspector mentioned the foundation"). Each entry includes the trigger condition, the cost range, what the specialist will actually tell you that the general inspector cannot, and when the answer will change your buying decision.
Report Triage System (Category A / B / C)
The system that turns a 50-page report into a one-page priority list. Every defect goes into one of three categories: Category A --- safety hazard or structural deficiency that must be resolved before closing or the deal should not proceed. Category B --- significant repair that affects the home's value or livability and belongs in your negotiation. Category C --- cosmetic, maintenance, or age-related wear that is not worth negotiating over. The guide includes decision rules for borderline cases, because most of the stress comes from items that could be B or C depending on severity, age, and context.
Post-Inspection Negotiation Playbook
You triaged your report. You have $14,000 in Category A and B items. Now what do you ask for --- and how? The playbook covers the two negotiation structures and why choosing the wrong one costs you real money: a $10,000 price reduction on a $200,000 home lowers your mortgage payment by roughly $50 per month but changes nothing on closing day. A $10,000 closing credit puts $9,000 to $10,000 back in your pocket at the closing table as reduced cash-to-close --- a $9,000 difference in day-one liquidity on the same dollar amount. The playbook walks through when to request each, how to frame the ask based on your Category A and B list, and how to present repair estimates that the seller's agent will take seriously.
4 Repair Request Letter Templates
Ready-to-customize templates covering: the standard repair-or-credit request, the safety-items-only escalation (when you want the deal but need the Category A items resolved), the full credit request with contractor estimates, and the conditional termination notice (when the inspection reveals a deal-breaker and you need to exercise your contingency). Each template includes fill-in fields for your specific defects, costs, and deadlines.
Final Walkthrough Verification Checklist
The seller agreed to make repairs. You are doing the final walkthrough 24 hours before closing. The checklist covers how to verify that each agreed repair was actually completed --- not just promised --- including what documentation to request (contractor invoices, permits, warranty transfers), what to physically check, and what to do if a repair was done improperly or not done at all.
New Construction and Flipped House Red Flags
New construction is not defect-free --- it is defect-hidden. Flipped houses are cosmetically renovated to pass a visual scan while concealing structural, electrical, and plumbing problems behind new drywall and fresh paint. The guide covers the specific red flags for each: permit gaps, unpermitted structural modifications, brand-new cosmetics over old systems, HVAC sizing mismatches, and the "lipstick on a pig" indicators that experienced inspectors look for but do not always flag in their reports.
Insurance Deal-Breaker Reference
Some inspection findings do not just cost money to fix --- they make the home uninsurable or trigger policy exclusions that leave you exposed. The reference lists the defects that commonly trigger insurance denial or exclusion: specific electrical panels, piping materials, roofing conditions, and structural issues that underwriters flag. Knowing these before you negotiate means you can demand resolution as a condition of closing, not discover the problem when you apply for insurance two weeks before move-in.
Complete Cost Reference Appendix (40+ Line Items)
Every repair cost cited in the guide is compiled in a single reference appendix with national cost ranges, regional adjustment notes, and the factors that move a repair from the low end to the high end of the range. Forty-plus line items covering electrical, plumbing, roofing, HVAC, structural, and specialty remediation --- so when your inspector writes "recommend replacement" you can immediately estimate the financial impact without calling three contractors.
The Free Checklist: 20 Items That Catch 80% of Deal-Breakers
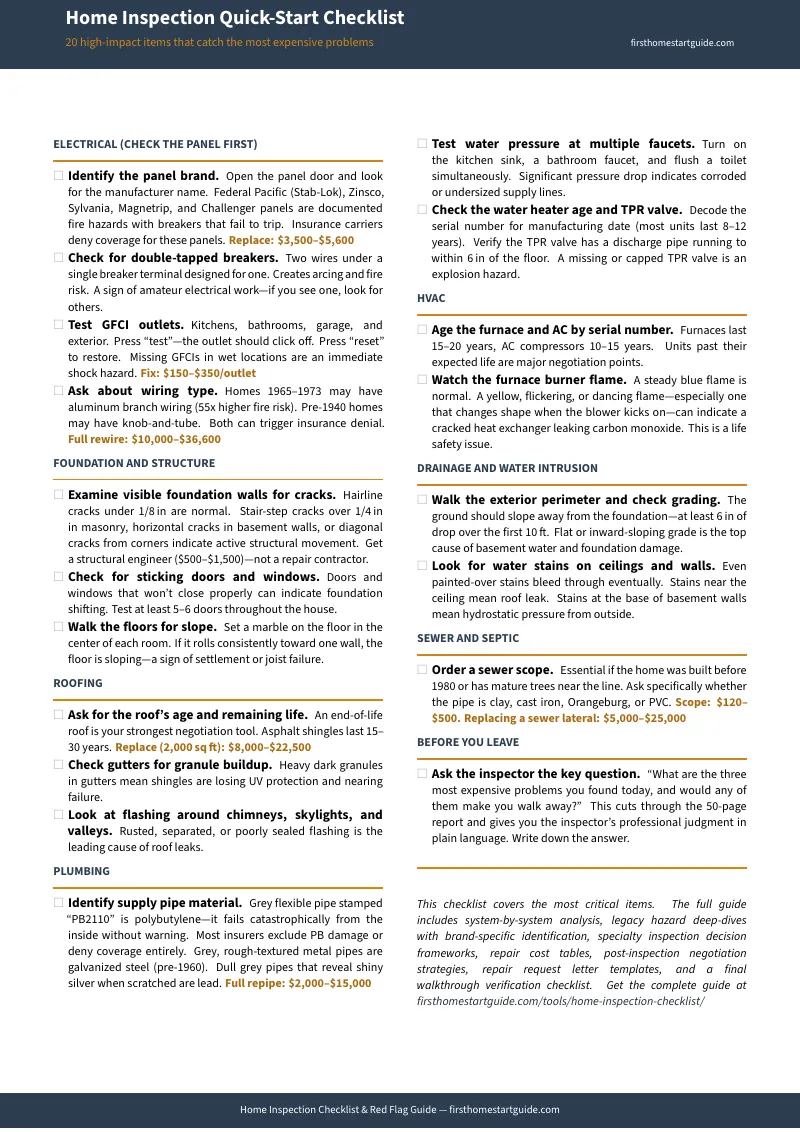
The Home Inspection Quick-Start Checklist is a free one-page reference covering the 20 highest-impact inspection items --- the specific brand names, material types, and visual indicators that correlate most strongly with expensive repairs, insurance complications, and walk-away-level defects. Each item includes the cost range and whether it triggers common insurance exclusions. Print it and bring it to your inspection, or use it to do a first pass on your report tonight.
Who This Guide Is For
- First-time buyers attending their first home inspection who want to know what they are looking at --- not in theory, but in the specific terms that appear in real inspection reports, with the brand names, material types, and cost ranges that turn confusion into confident decisions
- Buyers who just received their inspection report and have 5 to 10 days to respond with a repair request, a credit demand, or a decision to walk away --- and need to separate the 6 items that matter from the 140 that do not
- Buyers whose agent said "every house has issues" and who need an independent framework for evaluating whether this house's issues are normal maintenance, expensive-but-manageable repairs, or the kind of hidden liability that experienced buyers walk away from
- Anyone buying a home built before 1990 where the probability of encountering legacy electrical panels, outdated piping, aging sewer lines, or obsolete wiring systems is high enough to justify knowing what each one costs and what each one means for insurance
Why Not Free Resources?
- Free inspection checklists say "check the electrical panel." This guide tells you what FPE Stab-Lok breakers are, why they have a 25% failure-to-trip rate, what replacement costs including the NEC 230.85 emergency disconnect requirement, why most insurers will not write a policy on a home that still has one installed, and what to write in your repair request letter. The difference between "check the panel" and knowing the brand name, the failure mode, the cost, and the insurance consequence is the difference between walking past a $5,000 problem and catching it.
- Reddit threads and homebuyer forums (r/FirstTimeHomeBuyer, r/HomeInspections) give you anecdotal responses from strangers whose houses, climates, local codes, and risk tolerances are nothing like yours. You get "I had the same thing and it was fine" and "RUN --- do not buy that house" in equal measure, from people who cannot see your report and are not liable for their advice.
- Your inspector's report documents --- it does not advise. Inspectors are trained to observe and record. They are not trained (and in most states, not licensed) to tell you whether to buy the house, how much a repair will cost, or whether a defect is a deal-breaker. The report is designed to protect the inspector from liability, not to help you make a decision.
- Your agent wants the deal to close. That is not a character flaw --- it is the structure of the commission model. An agent who talks you out of a purchase earns zero. An agent who helps you negotiate a $10,000 credit earns roughly $150 to $300 less than one who closes at full price. The math does not incentivize your agent to help you find reasons to renegotiate or walk away.
This guide fills the gap between what your inspector documents and what you actually need to know to make a decision. It is the reference that would take a veteran inspector, a contractor, an insurance underwriter, and a real estate attorney sitting together in one room to assemble --- organized so you can match any finding from your report in under two minutes and know exactly what it costs, what it means for insurance, and whether it belongs in your negotiation.
--- Less Than the Cost of One Missed Red Flag
A single specialty inspection you did not need costs $150 to $500. A single legacy hazard you did not catch --- an FPE panel, polybutylene plumbing, a collapsed Orangeburg sewer line --- costs $3,500 to $15,000 to remediate after closing. The average first-time buyer does not lose money because the inspection missed something. They lose money because they did not know what to do with what the inspection found.
This guide gives you the interpretation layer that sits between the inspector's report and your decision --- the priority categories, the cost ranges, the insurance implications, the negotiation math, and the repair request templates. It turns a 50-page document designed to protect the inspector into a decision tool designed to protect you.
If it helps you catch one legacy hazard, avoid one unnecessary specialty inspection, or negotiate one repair credit with actual cost data behind it, it pays for itself before you finish reading the electrical section.
Money-back guarantee, no time limit. If the guide does not give you the clarity and confidence to evaluate your inspection report and negotiate from a position of knowledge, you pay nothing.
Download the free Home Inspection Quick-Start Checklist to see the 20 highest-impact items with brand names, cost ranges, and insurance indicators. When you are ready for the complete Inspection Interpreter System --- with 60+ red flags, legacy hazard profiles, the report triage framework, negotiation playbook, and repair request templates --- the full guide is here.
Your inspection report has the answers. This guide teaches you how to read them.